Why are there long earth walls between the Terracotta Warriors in Pit 1? If you look beyond the front ranks, the answer changes what you are seeing. The figures were placed in parallel underground corridors, separated by compacted earth and once covered by a timber roof. Today’s large steel hall protects an archaeological site that originally lay beneath the ground.
This guide is for visitors who have already taken in the famous army view and want to understand the structure around it. Spend ten focused minutes following one wall from the near edge toward the far end of the pit. That simple exercise makes the layout easier to read than trying to identify every individual soldier at once.
The short answer before you look down
- The walls are ancient structural divisions. Pit 1 was built as a series of long corridors for figures, horses, and chariots.
- The roof above visitors is modern. Qin-era timber, matting, and earth once closed the corridors overhead.
- Uneven sections matter. Exposed soil, broken material, and areas without upright figures are part of the archaeological record.
- Stay on the viewing route. Read the structure from the railings; display access and excavation work can change.
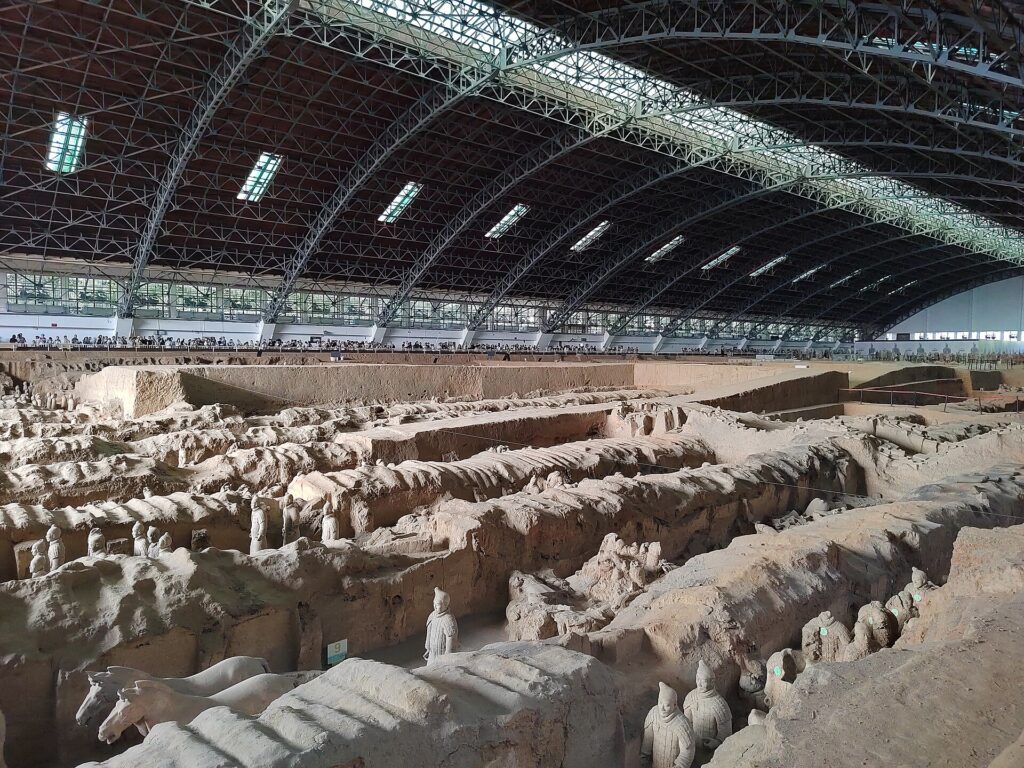
What the walls actually divided
Pit 1 is the largest of the main warrior pits. The museum’s visitor information gives an area of 14,260 square meters and an estimate of around 6,000 terracotta figures and horses. Those figures were not placed on one continuous, open floor. A series of long earthen partitions organized the underground space.
The Metropolitan Museum of Art describes eleven parallel corridors in Pit 1. From an elevated visitor viewpoint, look for the raised earth strips running through the hall. The spaces between them are the corridors. Some are crowded with upright soldiers; elsewhere you can see lower, less complete remains or an area without a restored standing formation.
It helps to distinguish a corridor from today’s visitor walkway. The ancient corridors held the buried army. You stand on a modern route above and around the protected excavation. The walls were part of the buried structure, not barriers built merely to separate tourists from the statues.
The plan matters as much as the number of figures. A broad photograph from the front can flatten the scene into a single crowd of soldiers. Following one partition wall with your eye restores the pit’s depth and shows how the formation was organized in separate lanes. For the military arrangement and the best first view, use our Pit 1 visitor guide.
How the underground structure was built
Archaeological accounts describe compacted, or rammed, earth in the pit’s ground and walls. The corridors had paved floors, and timber posts and beams supported a covering above. The remains of that construction, rather than an intact ancient roof, are what excavation can reveal. An American Journal of Archaeology review summarizes the earthen partitions, brick paving, timber framework, and evidence for mats and layers of earth above the beams.
Imagine the ancient sequence from bottom to top: prepared ground, a corridor floor, figures standing within the lane, timber spanning above, then a protective earth covering. This is a way to understand the excavated structure, not a claim that every roof component survives in place today. The huge metal arch that you see over the entire museum hall belongs to the modern visitor and conservation setting.
The museum’s account of Pit 2 excavation says that Pit 2 followed a comparable underground timber-and-earth construction method to Pit 1. It describes timber elements, treated foundations and walls, and an earth-covered top. That comparison helps explain why the warrior pits should be read as buildings buried with their contents, even though each pit has its own plan and military arrangement.
You do not need to identify every surviving beam impression to appreciate this. Look at the height of a wall relative to the figures, the straight line of its upper edge, and the different levels of material on either side. Each one tells you that the soldiers belonged to an engineered space, not an open field.
Where to see a partition most clearly
After viewing the famous front ranks, continue along the permitted side of Pit 1. Choose a place where the foreground wall and the corridor behind it are both visible. Start at the top edge of the earth. Follow it toward the back of the hall, then look down into the next lane. In a few seconds, the parallel pattern becomes easier to recognize.
The second photograph is a useful close comparison. The surviving earth does not look like a smooth, newly built wall. Its surface has rough edges and irregular material nearby. That roughness is a reason to observe carefully, not an invitation to label every ridge as a roof beam or every hollow as a doorway. Archaeologists identify features through controlled excavation and context, including evidence that is not obvious from the public walkway.
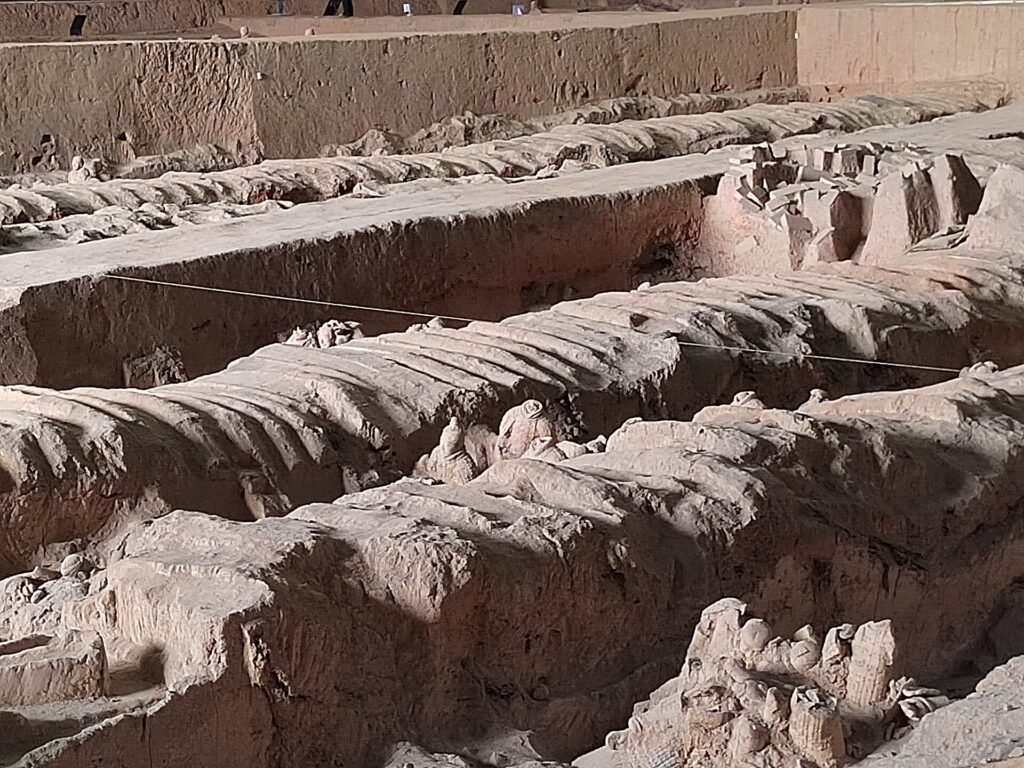
Lighting and the angle of the railings can hide details. If the spot is crowded, step aside and try again from the next permitted viewing point. A wider side view is often more informative for walls than a close photograph of the first row of warriors. If you want to take a picture, include both the wall edge and the corridor it borders so the image retains a sense of scale.
On a short museum visit, do this only after taking in Pit 1’s overall formation. Our museum route guide can help you allocate time across Pit 1, Pit 2, Pit 3, and the exhibits without spending the entire visit at the first railing.
Why not every corridor looks the same today
A visitor may expect neat, complete rows everywhere. Pit 1 is a working archaeological display, so that expectation is misleading. Figures were found in different states, and presenting a reassembled warrior requires documentation and conservation. Where surfaces are open, covered, lower, or visibly disturbed, the variation should not be read as an intentional gap in an ancient parade.
In the third photograph, the foreground is a broad exposed area; the restored standing figures are farther back. This is an honest part of the hall’s appearance. The photograph does not, by itself, tell us what lies beneath every covered section or when that section will be studied or displayed. Read the on-site labels and barriers for current information rather than inferring the excavation status from a picture.
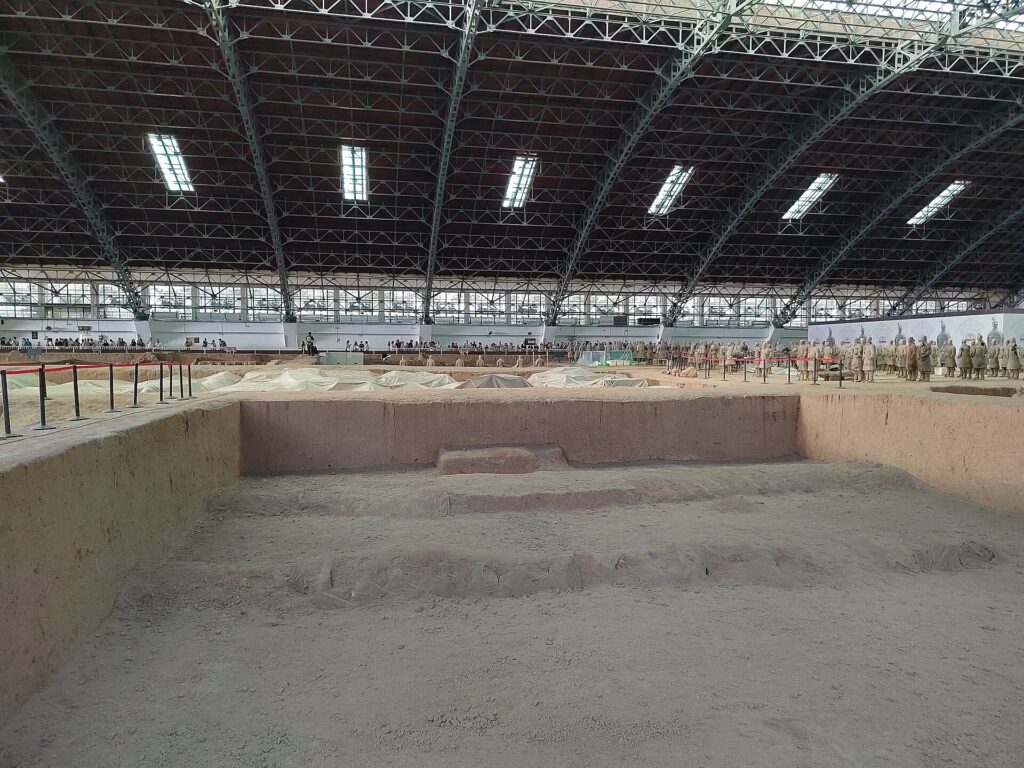
The contrast between intact-looking ranks and fragmentary zones also explains why this is more than a sculpture exhibition. The surviving walls, floor levels, and material around the figures preserve evidence of the burial environment. Our restoration guide follows the separate question of how damaged figures are documented and reassembled.
It is tempting to explain every broken figure by one dramatic event. Avoid making that leap from a public photograph. The site has a complex history, and the visible condition of one corridor cannot establish exactly when or why each object was damaged. What you can safely observe is the relationship between figures, earth partitions, and material still held within the pit.
A ten-minute route for reading Pit 1
- Take the wide view first. See the front ranks and the scale of the modern hall.
- Choose one wall. Follow its straight upper edge toward the back. Locate the two corridors it separates.
- Compare two zones. Find one corridor with standing figures and another with more exposed or broken material. Describe only what is visible.
- Look up once. Compare the present steel shelter with the description of the buried timber-and-earth covering. They belong to different periods.
- Move on. Leave time for the different arrangement in Pit 2, where the visitor experience is less about one sweeping front view.
At busy times, you may need to keep moving. You can still identify the pattern from a few good viewpoints without holding a railing for ten uninterrupted minutes. Visitors with limited mobility should use the designated accessible route and pause where space allows; there is no need to circle every side of the hall to understand the corridor structure.
Before you go
Check the museum’s current ticket and visitor notices before traveling, especially during holidays. Wear shoes suitable for a long visit on hard surfaces, and allow a little extra time for Pit 1 if you want to look past the front ranks. Display arrangements, conservation coverings, and permitted viewpoints can change, so treat photographs as examples of what to notice rather than a fixed map of what will be visible on your date.
The most useful question to carry into Pit 1 is not only “How many warriors are there?” Ask how the ground was prepared, how the corridors were separated, and what once covered them. The earth walls provide a visible answer: this was a carefully built underground setting for the army, and the museum lets you see parts of that construction alongside the figures.

Terracotta Army Museum Route Order: Which Pits to See First
Plan a practical Terracotta Army museum route order, including Pit 1, Pit 2, Pit 3, bronze chariots, crowds,…
What to Notice at the Terracotta Army: Faces, Ranks, and Hidden Details
A practical guide to the Terracotta Army details first-time visitors should notice, including faces, hairstyles, armor, ranks, poses,…
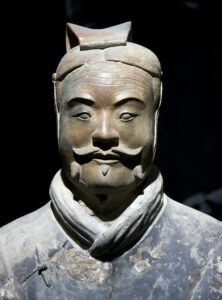
Terracotta Warrior Hairstyles and Headgear: What to Notice
A close-looking guide to Terracotta Warrior hair knots, caps, crowns, and officer headgear, with practical comparisons for a…